At Yarra Naturals, I am always thrilled when someone reaches out to find out how soap is made or they would like to learn how to make soap. It is such a fantastic skill and hobby! I’m passionate about all things soap and love sharing the process with others. It can be a bit daunting on where to start. So I have put together a little guide to help anyone who wants to try soap-making.
A word of warning: it can become quite addictive! There are so many different additives to explore, and it’s exciting to choose the perfect scents, colours, and ingredients. For example, pink clay is excellent for soap as it acts as a gentle exfoliant and detoxifier, and adds a lovely touch of colour. Activated charcoal, on the other hand, creates a powerful cleansing bar not to mention the range of essential oils to choose from as well as fragrances.
Please note: This recipe is for cold-process soap making, which involves the use of lye and is not recommended for children. However, don’t worry! Melt and Pour soap is a fantastic alternative and serves as a great introduction before diving into cold-process soap making.
To begin check out these great videos on soap making:
- How To Make Cold Process Soap – Basics Of Soap Making | BrambleBerry.com
- How to Make Cold Process Soap: Basic Terms, Episode 2 | Bramble BerryAnne Marie from Soap Queen TV and the founder of Brambleberry is an amazing soap and candle supplier and also a great resource for learning about all things soap, candles and more.
- Soap Making Tutorial for Beginners – Full Demonstration & Cold Process Soap Beginner RecipeElly is an amazing soap maker and does amazing videos on making soap and explains everything very well.
Still keen? Let’s go! Here is a basic recipe to get started.
CASTILE (100% OLIVE OIL) SOAP RECIPE
This soap recipe is the perfect starting point if you have never made soap before. It only uses three ingredients! Castile soap (100% olive oil soap) is very goof for mature skin and sensitive skin. Once you get more familiar with soap making you can start adding scents, different colours and additives which is where things get really interesting. Also, Soap Queen TV/Brambleberry have some great recipes that use different oils. Just remember that certain additional additives can introduce complexities such as your batter thickening up faster than expected so it is always good to research before you begin.
INGREDIENTS:
⦁ 74.97g lye (also called caustic soda and also sodium hydroxide)
⦁ 167.64g demineralized or distilled water
⦁ 576g virgin olive oil
EQUIPMENT:
⦁ 2 mixing bowls (plastic or glass. Not aluminium as this causes a reaction with the lye and can be toxic)
⦁ Spatula (rubber)
⦁ Saucepan (non-aluminium)
⦁ Stick blender
⦁ Thermometer (I like the infrared digital ones)
⦁ Scale
⦁ Mould that can handle at least 1kg of soap mix (you can use silicone baking moulds, an empty milk carton or wooden boxes)
⦁ Baking paper for lining your mould. If using silicone you will not need to line.
⦁ Rubber gloves
⦁ Goggles/Safety glasses (onion goggles work well as they do not fog up and you can purchase on Amazon or eBay)
⦁ Apron
⦁ Closed shoes, long sleeves and pants, paper towel, towelling, wet cloth for mopping up any spills
BEFORE YOU BEGIN:
⦁ Choose a well-ventilated, safe and low-traffic area to work that is away from kids and pets.
⦁ Read each step entirely before commencing.
⦁ Read the lye safety section of this booklet before making soap.
⦁ Once you use a spatula, bowel, stick blender for soap do not use for anything else other than soap.
INSTRUCTIONS:
- Line your mould with baking paper. No need if you have a silicone mould.
- Put on your long-sleeved top, long pants, rubber gloves and eye goggles. Place any pets in another room or outside. Ensure that the space is pet-free and child-free. Look over your space and be sure that you are comfortable and that it is to your satisfaction.
- SAFETY NOTE: Keep your safety gear on throughout making your soap. Soap and lye can often get on your gloves when picking up or moving bowels, utensils etc, so be mindful of that when adjusting your eye goggles if they fog up while wearing them or touching your skin, pushing your hair out of your face and so on.
SAFETY NOTE: Do not use aluminium bowls, utensils or saucepans while making soap. Lye and aluminium become toxic together. Plastic, glass or stainless steel is fine.
- SAFETY NOTE: Keep your safety gear on throughout making your soap. Soap and lye can often get on your gloves when picking up or moving bowels, utensils etc, so be mindful of that when adjusting your eye goggles if they fog up while wearing them or touching your skin, pushing your hair out of your face and so on.
- Using a scale measure out your lye into a bowl and set aside.
- Measure out your demineralized or distilled water in another bowl and set aside. In a well-ventilated area such as outside or near an open window slowly and carefully add the lye to the water. Gently stir with a wooden spoon or spatula until the lye has fully dissolved and the liquid is clear. It will get very hot and fumes will rise. Avoid breathing in any of the fumes by stirring from a distance and pointing the fumes away from you. Set aside out of the way to cool.
SAFETY NOTE: It is important here to not add your water to your lye. It’s lye into the water.
SAFETY NOTE: Avoid breathing in the fumes that may rise up when stirring.
- Measure out your olive oil into a saucepan.
- Heat your olive oil on a stove to 32C – 43C / 90F – 100F. Start off on low heat and every few minutes using your thermometer check its temperature.
NOTE: Be careful here as the oil will rapidly increase in heat and can easily go well past the temperature you want. If this occurs turn off the heat immediately and put it in the fridge to cool with a tea towel underneath or leave it until it comes back down to the right temperature. - Check on your lye water’s temperature. You are aiming for your lye water and your olive oil to be within 10 degrees of each other and between 32C – 43C / 90F – 100F. If one reaches this sooner than the other put a lid on it to slow it cooling down further until the other one is ready. It’s a bit of a juggling act but the more soap you make the easier it gets as you learn to time everything.
- Once the lye water and the oils have both the right temperatures (and are ideally within 10 degrees of each other), gently add the lye water to the oil. Go slowly to avoid splashing.
- 9. Place your stick blender in and give it a slight jiggle or tap while fully submerged. You may notice a few air bubbles pop to the surface. This is good as it releases any air bubbles.
- Stick blend everything together. It will start to go cloudy, then will turn a lovely buttery colour and will start to thicken the more you stick blend it. Keep going until it is thick like custard but still can easily be poured. This can take several minutes.
Image - Pour it all into the soap mould and use a spoon or spatula to even out the top if necessary. Tap the mould gently on the counter to help get rid of any bubbles. Not too hard as you don’t want it to splash on you.
Image - Keep it warm by placing a towel or cloth over the top and put it in an out-of-the-way place where it will not be disturbed. Leave it for 15-24 hours. This will vary depending on the weather and the humidity. You’ll know it’s ready when it is no longer like custard and more like hard butter.
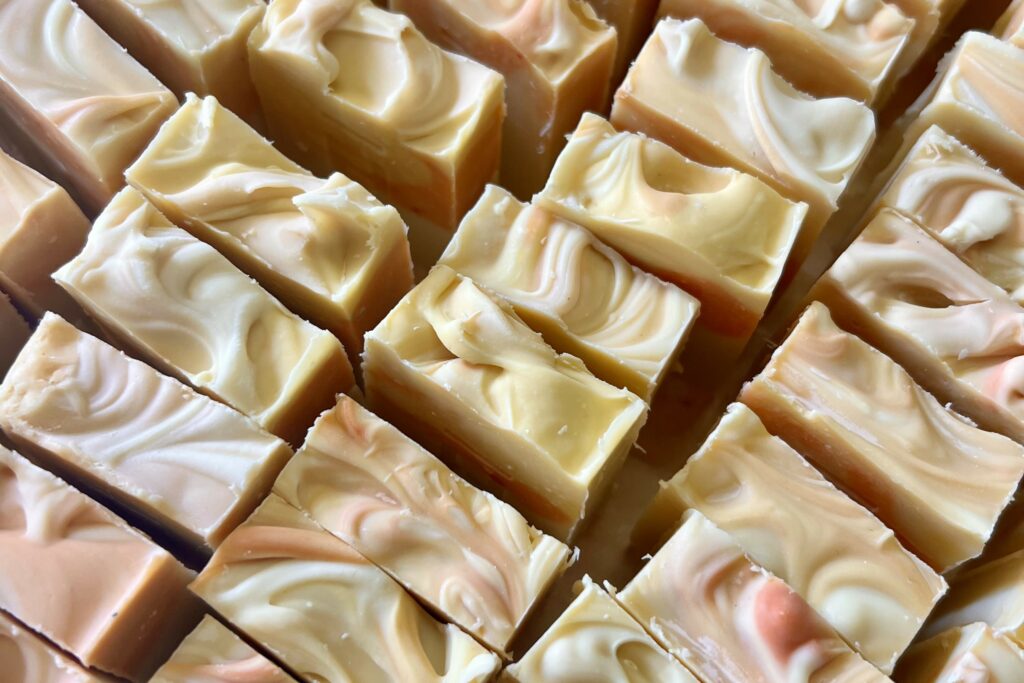
- Wearing gloves and safety goggles, carefully remove from the mould and cut into bars with a knife. .
- Your soap now needs to cure. Evenly space your bars on a tray or in a shoebox to allow air to pass between and around each bar. Now, put them somewhere well-ventilated and out of the way like on top of a cupboard. Allow the bars to cure for 4-6 weeks and enjoy!
COMMONLY-USED TERMS:
Saponification: When Lye, water and oil combine a chemical reaction takes place called saponification. The result is soap.
Superfat: Soap is designed to clean our skin but without also containing moisturizing and hydrating properties would be too harsh and dry our skin out. Superfatting is the portion of oil in your recipe that has not been combined with the lye to turn into soap. This unsaponified oil will act as a moisturizer, soften and hydrate the skin. On average most soap makers have a 5% superfat. Your recipe provided has a 5% superfat.
Trace: After you have added your lye water and oil together and blended, it will start to thicken and become emulsified (meaning they combine and become a smooth mixture) There will be no streaks of oil and the soap will be the consistency of thin cake batter.
Light trace is indicated when you would drizzle soap on the surface and it sits on top leaving a line or dollop before sinking back into the mix. As the soap sits or if you continue to blend, it will continue to thicken to medium and thick trace. Knowing when your soap batter has reached a thick trace is useful as this is when you would usually add colourants or scents.
Curing: Technically, cold-process soap is safe to use after a few days. However, it is recommended to let the soap cure for 4-6 weeks in a cool, dry place with good airflow. Excess water will evaporate, which creates harder and milder bars that last longer in the shower. It’s worth the wait.
Lye Calculator: When you are ready to formulate your own recipes the Brambleberry Lye Calculator found on the Brambleberry website makes formulating cold process recipes easy and it is free. Find it at https://www.brambleberry.com/. There is also a YouTube video that guides you through it.
Soda ash: This creates an uneven, white, ashy film on the soap. It forms when unsaponified lye reacts with naturally occurring carbon dioxide in the air. It doesn’t affect the quality and the soap is safe to use. However, it can obscure more intricate designs or make the bars feel crumbly.
Gel phase: Your soap may reach gel phase after you pour it into your mould and can reach as hot as 180°F and develop a gelatinous appearance. Gelled soap has a brighter colour and a slightly shiny appearance. It can also be unmolded more quickly. Some makers force their soap through gel phase with blankets and heating pads. However, gel phase isn’t required – it’s a personal preference. It only affects the look of the bars, not the quality. Un-gelled soap has a more matte appearance. You can prevent gel phase by putting soap in the freezer for 24 hours.
RESOURCES:
Soap Queen TV has four beginner YouTube tutorials that teach a range of techniques and show you step by step.
You can find many soap makers on YouTube offering free tutorials and tips on the art of soap making.
INGREDIENT SUPPLIERS:
Aussie Soap Supplies – Based in Western Australia they supply all kinds of soap equipment, fragrances and essential oil.
Escentials – Based in Noosa they supply essential oils, some fragrances, clays and various other ingredients. They have a great range of ingredients.
Eroma – Offer many fragrance oils. Be sure to do your research on how the fragrance oil will perform in your soap. For example, scents with a lot of vanilla will make your soap go brown.
New Directions – Based in Sydney they are a wide range of ingredients, essential oils and fragrances.
Scent Method – Have a great range of fragrances. Be sure to do your research on how the fragrance oil will perform in your soap. For example, scents with a lot of vanilla will make your soap go brown.
Australian Wholesale Oils – A great range of essential oils and additives.
Sydney Essential Oil Co (SEOC) – offers a wide range of essential oils.
Bunnings: Bunnings sell lye (also called caustic soda and also sodium hydroxide). You can also purchase 5-litre containers of demineralized water here too.
Woolworths/Coles – supply up to 4-litre containers of virgin olive oil and demineralized water (found in the cleaning section), coconut oil.
K-mart – great for well-priced mixing bowls, spatulas and bamboo wooden boxes (found in the kitchen section) for moulds.
EBay/Amazon– offers cheap silicone moulds, onion goggles, aprons and soap tools.
A note on palm oil – always use sustainably sourced and ethically sourced palm oil.
BACK TO BASICS: LYE SAFETY GUIDE
Taken from Soap Queen website at https://www.soapqueen.com/bath-and-body-tutorials/tips-and-tricks/back-to-basics-lye-safety-guide/
To make soap, oils must emulsify (become fully mixed) with lye, which begins the saponification process. During this process, it’s important to make safety a top priority. Sodium hydroxide lye is highly caustic and has the potential to burn the skin. Like driving a car, sodium hydroxide is safe when handled properly. But because lye has the potential to be extremely dangerous, it’s important to take every safety precaution when making cold-process soap.
Sodium hydroxide lye is available in various forms, such as flakes, pellets and powder. To make cold-process soap, lye is introduced to a liquid-like distilled water. The liquid dissolves the lye and creates a lye solution. Mixing water and lye creates an exothermic reaction that causes a dramatic temperature increase. Adding lye to room temperature water can cause the water to reach temperatures up to 200 ° F. The mixture also creates fumes, which should not be inhaled.
Yes, all this information sounds a little scary, and it’s totally normal to be nervous when first working with lye. Luckily, it’s easy to protect oneself from harm when creating lye solution. Below are my basic lye safety tips. I also recommend watching the How to Make Cold Process Soap: Lye Safety & Ingredients video below.
Wear Proper Safety Gear: When working with lye, wearing protective safety gear is a must. This includes eye goggles, gloves, long sleeves and long pants. Covering your skin helps protect it from spills or drops of lye solution. Some soapers also like to wear surgical masks to avoid breathing in any fumes.
Mix Lye in an Appropriate Place: The area in which you mix your lye solution should have good ventilation to avoid breathing in lye fumes. When the weather allows, some soapers like to mix their lye solution outside to get the best ventilation possible. When indoors, I like to open a few windows or turn on a fan. In addition to ventilation, it’s important to make sure kids, pets and other distractions and tripping hazards are out of the house or don’t have access to your soaping space. Some soapers prefer to soap with a ventilator or air filter on to help filter out any fumes that happen during the mixing process.
Always Add Lye to Water (Never Water to Lye!): When mixing water and lye the first step is to measure the correct amounts into separate containers. Once you have the correct amounts for your recipe, the lye should be slowly added to the water. NEVER add water to your lye! Doing so can cause the lye to expand, or erupt, out of the container.
Use an Appropriate Mixing Container: It’s important to mix your lye solution in a durable and safe container. The container should be a sturdy, heat-resistant plastic or glass. I don’t recommend mixing lye solution in a metal container. This is because the lye solution gets incredibly hot. It’s also because lye and some metals produce a hazardous reaction. Sodium hydroxide and aluminium produce hydrogen gases, which can be extremely dangerous. Lye also reacts with tin. To be on the safe side, I avoid metal containers entirely. If using glass, make sure your container is extremely sturdy. I have used Pyrex containers successfully for years, but I know some soapers have had experience with these containers breaking. On occasion, I also use Easy Pour and Mixing Containers to mix my lye, as they are made out of a sturdy plastic. I recommend choosing a container that is large enough to catch any splashes as you stir. To be extra safe, mix your lye and water over a sink in case there are any spills.
Store Lye Appropriately: While waiting for the lye solution to cool to suitable soaping temperatures, make sure your container is clearly labelled “LYE” to ensure nobody touches or tampers with the solution. It’s also helpful to move it to a place where kids or pets will not touch or drink the solution. The jar of lye flakes, pellets or powder should always be kept out of reach of children, and should be properly labelled “POISON,” or “DO NOT TOUCH,” to ensure people do not tamper with the lye.
If You Get Lye on Your Skin: According to the sodium hydroxide MSDS (Material Safety Data Sheet), if your skin comes in contact with lye, remove any contaminated clothing. Flush immediately with plenty of water for at least 15 minutes. Seek medical attention. If it comes in contact with your eyes, flush immediately with water for at least 15 minutes and get medical attention. If inhaled, move to fresh air.
Many soapers keep vinegar on hand, believing it neutralizes lye burns. There is some controversy in the soapmaking community about washing lye burns with vinegar rather than water. Adding vinegar (an acid) to lye (a base) creates a chemical reaction that releases more heat. Additionally, the act of putting vinegar on a lye burn hurts. Just use water as the MSDS sheet suggests.
Although vinegar should not be used to treat lye burns on the skin, it can be used as a precaution during the cleanup process. A quick wipe of your workspace with a vinegar-soaked rag will neutralize any lye dust that may have gotten on the surface.
Now that you have safely mixed your lye solution, it’s time to make cold-process soap. But safety doesn’t stop here! During the entire soap-making process, it’s important to wear your safety gear which includes goggles, long sleeves and pants, and gloves. This is because the lye solution still has the potential to irritate the skin once mixed with soaping oils.
Once you pour the lye solution into the oils and begin to emulsify, the saponification process begins. For an in-depth explanation of what saponification means, check out this blog post and Soap Queen TV video. As the saponification process develops, the lye solution becomes less caustic. Raw soap batter is not as dangerous as pure lye water, but it can still irritate the skin. Wearing safety gear while soaping helps avoid any contact with the soap batter. If soap batter touches the skin, you may not notice until several minutes later when your skin begins to tingle and burn. Quickly wash away any soap batter on the skin with water and a gentle soap. Once saponification is complete, all lye molecules have been transformed into soap and will not harm the skin.
ImageThe soap above has reached a thin trace. If you were to get the mixture on your skin, wash it off immediately under cool water for several minutes until the itching or burning subsides.
After you’re done soaping, it’s time to wash your dishes. Because the soap will still irritate the skin, leave your gloves on while washing any soap dishes. I recommend wiping out any excess soap with a paper towel, then washing your dishes in the sink with hot water and grease-cutting soap like Dawn. If you want to avoid washing oils down the sink, you may prefer the “garbage bag clean up method.” Read about each cleanup method in the Soapy Session Clean-Up Guide.
Making cold-process soap is extremely rewarding and fun. During my entire “soaping lifetime,” I have never experienced a serious lye burn. I have experienced both lye water and soap batter on my skin but was able to wash it off right away with no serious harm done. The worst injury I ever experienced while soaping was when I got fresh soap in a cut on my hand…ouch! I attribute my soaping good fortune to always taking the extra steps to ensure safety for myself and the people around me. Much like wearing a seat belt when driving a car, proper safety precautions are the first step in creating homemade soap.